Npm
Содержание:
Media types
Images
The standard way of using fancyBox is with a number of thumbnail images that link to larger images:
By default, fancyBox fully preloads an image before displaying it.
You can choose to display the image right away.
It will render and show the full size image while the data is being received.
To do so, some attributes are necessary:
- — the real width of the image
- — the real height of the image
fancyBox supports «scrset» so I can display different images based on viewport width. You can use this to improve download times for mobile users and over time save bandwidth.
Example:
It is also possible to protect images from downloading by right-click.
While this does not protect from truly determined users, it should discourage the vast majority from ripping off your files.
Inline
For your Inline HTML you have to place a DIV Container into the content of the page:
And then simply create a link using attribute that matches CSS id selector of the element you want to open ( in this example):
Ajax
To load content via AJAX, you need to add a attribute to your link:
Additionally it is possible to define a selector with the attribute to show only a part of the response. The selector can be any string, that is a valid jQuery selector:
Iframe
If the content can be shown on a page, and placement in an iframe is not blocked by script or security configuration of that page,
it can be presented in a fancyBox:
To access and control fancyBox in parent window from inside an iframe:
Iframe dimensions can be controlled by CSS:
These CSS rules can be overridden by JS, if needed:
If you have not disabled iframe preloading (using an «preload» option), then the script will atempt to
calculate content dimensions and will adjust width/height of iframe to fit with content in it.
Keep in mind, that due to same origin policy,
there are some limitations.
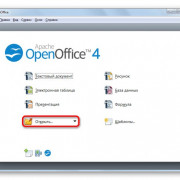
1. Установка
- Подключаем CSS: jquery.fancybox.css или минимизированную jquery.fancybox.min.css
- Подключаем jQuery (если не подключена ранее)
- Подключаем JS: jquery.fancybox.js или минимизированную jquery.fancybox.min.js
Ссылки даны на необходимые файлы версии 3.5.7. Более новую версию или дополнительную информацию можно посмотреть на сайтах github.com и fancyapps.com
Если использовать стандартные настройки и атрибуты, то инициализировать скрипт нет необходимости.
Если нужно подключить fancybox к определенным элементам, то используется:
$(‘.my-element’).fancybox({
/* настройки */
});
|
1 |
$(‘.my-element’).fancybox({ /* настройки */ }); |
Examples
Below are some basic examples.
You can also view the sekFancyBox & Gallery example.
Inline Type
Display inline is default behavior, and is easy to call with just two properties:
For multiple inline modal windows on a single page, the link property must be set to prevent clashing modal windows (remember that for the inline type this must not have any spaces):
This can become more complex by calling several options:
Iframe Type
Define type as iframe to display another website within your own site, type of iframe must be used:
If linking to an external website, it is recommended one defines a weblink resource, then call that weblink resource by the id ( &link= ).
Document Type
Define type as document to display a file within your own site ( can be htm, or even txt file):
This is nice to display large amounts of formatted information without placing it inline on the current page. Use this for calling a resource with an empty template, or defining a «BlankTemplate» (defining a «BlankTemplate» would allow one to use tags like ], where empty templates will only display the content itself).
If linking to a .txt file, it is recommended one defines a static resource, then call that static resource by the id.
Media Type
Define type as media to display images or even flash:
If linking to an external website, it is recommended one defines a weblink resource, then call that weblink resource by the id ( &link= ).
Media Type Groups
In the below example, the four photos are set up in two groups. Group1 is using the thumbnailhelper option, and group2 is using the buttonhelper option. The modalclass is used here because there are two groups using different options within each group. This will cause conflicts if both groups are using the same class.
Свой контент в модальном окне
Чтобы разместить в модальном окне свой контент, нужно повесить на ссылку по клику на которую он будет появляться, класс используемый при вызове FancyBox. В атрибуте href данной ссылки следует указать id вызываемого блока:
<a class=»gallery» href=»#fox»>Лиса?</a>
<div style=»display:none»>
<div id=»fox»>Лисица — хищное млекопитающее семейства псовых, наиболее распространённый и самый крупный вид рода лисиц.</div>
</div>
|
1 |
<aclass=»gallery»href=»#fox»>Лиса?<a> <div style=»display:none»> <div id=»fox»>Лисица—хищноемлекопитающеесемействапсовых,наиболеераспространённыйисамыйкрупныйвидродалисиц.<div> <div> |
Данная возможность часто используется для создания всплывающих с формами обратной связи или роликами с Youtube.
Так же существует возможность показа контента из файла указанного в атрибуте href:
<a class=»gallery» href=»/test.php»>Test/a>
| 1 | <aclass=»gallery»href=»/test.php»>Testa> |
Setup
You can install fancybox by linking
and
files to your html file. Make sure you also load the jQuery library. Below is a basic HTML template
to use as an example:
<!DOCTYPE html>
<html>
<head>
	<meta charset="utf-8">
	<title>My page</title>

	<!-- CSS -->
	<link rel="stylesheet" type="text/css" href="jquery.fancybox.min.css">
</head>
<body>

	<!-- Your HTML content goes here -->

	<!-- JS -->
	<script src="https://code.jquery.com/jquery-3.2.1.min.js"></script>
	<script src="jquery.fancybox.min.js"></script>
</body>
</html>
Download fancybox
Download the latest version of fancybox on
GitHub.
Or just link directly to fancybox files on cdnjs —
https://cdnjs.com/libraries/fancybox.
Подключаем плагин lightgallery
Подключение плагина lightgallery состоит из двух этапов:
-
Подключение css-файла в <head> документа
Дообавляем CSS
<head>
<link rel=»stylesheet» href=»css/lightgallery.css»>
</head>1
2
3<head>
<link rel=»stylesheet»href=»css/lightgallery.css»>
<head>
-
Подключение js-файла перед закрывающимся </body>:
Дообавляем JS
<body>
…<script src=»js/lightgallery.min.js»></script>
<!— lightgallery plugins —>
<script src=»js/lg-thumbnail.min.js»></script>
<script src=»js/lg-fullscreen.min.js»></script>
</body>1
2
3
4
5
6
7
8
9<body>
…
<script src=»js/lightgallery.min.js»></script>
<!—lightgalleryplugins—>
<script src=»js/lg-thumbnail.min.js»></script>
<script src=»js/lg-fullscreen.min.js»></script>
<body>
Здесь вы можете дополнительно подключть плагины, которые позволят вам отобразить миниатюры изображений и сделать доступным полноэкранный просмотр фото.
Lightgallery также поддерживает модули AMD, CommonJS и ES6. При использовании AMD убедитесь, что lightgallery.js загружается до модулей lightgallery.
Загрузка lightgallery.js
JavaScript
require([‘./lightgallery.js’], function() {
require([«./lg-zoom.js», «./lg-thumbnail.js»], function(){
lightGallery(document.getElementById(‘lightgallery’));
});
});
|
1 |
require(‘./lightgallery.js’,function(){ require(«./lg-zoom.js»,»./lg-thumbnail.js»,function(){ lightGallery(document.getElementById(‘lightgallery’)); }); }); |
FAQ
Opening/closing causes fixed element to jump
Simply add CSS class to your fixed positioned elements.
Example of using Bootstrap navbar component:
The script measures width of the scrollbar and creates CSS class
that uses this value for property.
Therefore, if your element has , you should positon it using and properties instead. Example:
How to customize caption
You can use option that accepts a function and is called for each group element. Example of appending image download link:
Inside method, refers to the clicked element. Example of using different source for caption:
How to reposition thumbnail grid
There is currenty no JS option to change thumbnail grid position.
But fancyBox is designed so that you can use CSS to change position or dimension for each block
(e.g., content area, caption or thumbnail grid).
This gives you freedom to completely change the look and feel of the modal window, if needed.
View demo on CodePen
P.S.
В прошлом моём опыте я в первый раз так плотно столкнуля с библиотекой fancybox 3. До этого я пользовался другими библиотеками. Почему я не писал о них?! Мне всегда казалось, что они не завершённые и с ними приходилось идти на компромисы в случаех с JS или их UI. В fancy же, как мне кажется, есть всё, что нужно и его элементы отлично выглядят, он отлично работает на мобильных. Думаю, что я воспользуюсь им еще не раз и поделюсь своим опытом с вами. Думаю я расскажу про его API и о случаех в которых можно его использовать, а главное как. Всего хорошего
Поддержи Xakplant
Я давно хочу развить видеоверсию, но пока этого не получается из-за нехватки ресурсов. Сейчас я собираю деньги на новый компьютер и микрофон. Поддержи xaklant и ты увидишь полезные видео быстрее.
Подключение Fancybox к странице сайта
Скачайте архив с плагином, распакуйте его, скопируйте все файлы, включая сценарии js и файлы стилей css в папку на вашем сервер.
Можете сразу же для порядка разместить файлы в зависимости от типа по соответствующим папкам (файлы css в папку styles, файлы js в папку javascripts), но помните что если вы это сделаете, то вам нужно будет убедиться, что пути в CSS файлах к скриптам и пути в файлах JS к фалам стилей соответствуют новому их расположению на вашем сервере. Так же не забудьте подключить к странице последнюю версию библиотеки JQuery (на момент написания поста это версия 2.1.1)
Пример:
<!— Подключаем jQuery библиотеку —>
<script type=»text/javascript» src=»http://code.jquery.com/jquery-latest.min.js»></script>
<!— Подключаем mousewheel плагин (по необходимости, в основном нужен для мобильных устройств) —>
<script type=»text/javascript» src=»/fancybox/lib/jquery.mousewheel-3.0.6.pack.js»></script>
<!— Подключаем непосредственно FancyBox —>
<link rel=»stylesheet» href=»/fancybox/source/jquery.fancybox.css?v=2.1.5″ type=»text/css» media=»screen» />
<script type=»text/javascript» src=»/fancybox/source/jquery.fancybox.pack.js?v=2.1.5″></script>
<!— По необходимости подключаем вспомогательные элементы — стили кнопок, оформление эскизов и/или медиа файлов —>
<link rel=»stylesheet» href=»/fancybox/source/helpers/jquery.fancybox-buttons.css?v=1.0.5″ type=»text/css» media=»screen» />
<script type=»text/javascript» src=»/fancybox/source/helpers/jquery.fancybox-buttons.js?v=1.0.5″></script>
<script type=»text/javascript» src=»/fancybox/source/helpers/jquery.fancybox-media.js?v=1.0.6″></script>
<link rel=»stylesheet» href=»/fancybox/source/helpers/jquery.fancybox-thumbs.css?v=1.0.7″ type=»text/css» media=»screen» />
<script type=»text/javascript» src=»/fancybox/source/helpers/jquery.fancybox-thumbs.js?v=1.0.7″></script>
|
1 |
<!—ПодключаемjQueryбиблиотеку—> <script type=»text/javascript»src=»http://code.jquery.com/jquery-latest.min.js»></script> <!—Подключаемmousewheelплагин(понеобходимости,восновномнужендлямобильныхустройств)—> <script type=»text/javascript»src=»/fancybox/lib/jquery.mousewheel-3.0.6.pack.js»></script> <!—ПодключаемнепосредственноFancyBox—> <link rel=»stylesheet»href=»/fancybox/source/jquery.fancybox.css?v=2.1.5″type=»text/css»media=»screen»/> <script type=»text/javascript»src=»/fancybox/source/jquery.fancybox.pack.js?v=2.1.5″></script> <!—Понеобходимостиподключаемвспомогательныеэлементы-стиликнопок,оформлениеэскизови/илимедиафайлов—> <link rel=»stylesheet»href=»/fancybox/source/helpers/jquery.fancybox-buttons.css?v=1.0.5″type=»text/css»media=»screen»/> <script type=»text/javascript»src=»/fancybox/source/helpers/jquery.fancybox-buttons.js?v=1.0.5″></script> <script type=»text/javascript»src=»/fancybox/source/helpers/jquery.fancybox-media.js?v=1.0.6″></script> <link rel=»stylesheet»href=»/fancybox/source/helpers/jquery.fancybox-thumbs.css?v=1.0.7″type=»text/css»media=»screen»/> <script type=»text/javascript»src=»/fancybox/source/helpers/jquery.fancybox-thumbs.js?v=1.0.7″></script> |
далее создаем ссылки, которые будут вести на элементы, которые мы собираемся открыть с помощью Fancybox (за каламбур прошу простить )
<a class=»fancybox» rel=»group» href=»big_image_1.jpg»><img src=»small_image_1.jpg» alt=»» /></a>
<a class=»fancybox» rel=»group» href=»big_image_2.jpg»><img src=»small_image_2.jpg» alt=»» /></a>
|
1 |
<aclass=»fancybox»rel=»group»href=»big_image_1.jpg»><img src=»small_image_1.jpg»alt=»»/></a> <aclass=»fancybox»rel=»group»href=»big_image_2.jpg»><img src=»small_image_2.jpg»alt=»»/></a> |
Вызывать Fancybox следует только после загрузки страницы как показано ниже. Если вы не знакомы с JQuery, то вам нужно получить хотя бы минимальные знания. Соответствующие курсы можно спокойно найти в интернете.
<script type=»text/javascript»>
$(document).ready(function() {
$(«.fancybox»).fancybox();
});
</script>
|
1 |
<script type=»text/javascript»> $(document).ready(function(){ $(«.fancybox»).fancybox(); }); </script> |
В следующих постах мы на примерах рассмотрим различные варианты использования Fancybox на страницах вашего сайта.
Друзья,
напишите в комментариях стоит ли мне
записать и выложить видео по подключению
данного скрипта как я это сделал тут:
Разные варианты работы плагина
Кроме простого увеличения картинки, плагин пожно использовать для мультимедиа:
<a id="inline" href="#data">Это покажет содержание элемента, который имеет id="data"</a>
Для iframe:
<a href="http://www.mpbox.ru?iframe">Это iframe</a>
или
<a class="iframe" href="http://www.mpbox.ru/">Это iframe</a>
ajax:
<a href="http://www.mpbox.ru/data.php">Это контент, который будет подгружаться с помощью ajax</a>
Если нужно сгруппировать несколько элементов в галерею, нужно добавить им одинаковый rel:
<a id="single_image" rel="group" href="image1.jpg"><img src="image1small.jpg" alt=""/></a>
<a id="single_image" rel="group" href="image2.jpg"><img src="image2small.jpg" alt=""/></a>
<a id="single_image" rel="group" href="image3.jpg"><img src="image3small.jpg" alt=""/></a>
<a id="single_image" rel="group" href="image4.jpg"><img src="image4small.jpg" alt=""/></a>
Пример инициализации скрипта для галереи (атрибут title станет подписью картинки):
jQuery("a").fancybox({
		'transitionIn'		: 'none',
		'transitionOut'		: 'none',
		'titlePosition' 	: 'over',
		'titleFormat'		: function(title, currentArray, currentIndex, currentOpts) {
					return '<span id="fancybox-title-over">Image ' + (currentIndex + 1) + ' / ' + currentArray.length + (title.length ? '   ' + title : '') + '</span>';
				}
});
Показ/скрытие title под наведению мыши
jQuery("a").fancybox({
	'titlePosition'	:	'over',
	'onComplete'	:	function() {
		jQuery("#fancybox-wrap").hover(function() {
			jQuery("#fancybox-title").show();
		}, function() {
			jQuery("#fancybox-title").hide();
		});
	}
});
Кастомизация title
function formatTitle(title, currentArray, currentIndex, currentOpts) {
     return '<div id="tip-title"><span><a href="javascript:;" onclick="$.fancybox.close();"><img src="/data/closelabel.gif" /></a></span>' + (title && title.length ? '<b>' + title + '</b>' : '' ) + 'Картинка ' + (currentIndex + 1) + ' из ' + currentArray.length + '</div>';
}

$("a").fancybox({
	'showCloseButton'	: false,
	'titlePosition' 	: 'inside',
	'titleFormat'		: formatTitle
});
#tip-title {
	text-align: left;
}
#tip-title b {
	display: block;
	margin-right: 80px;
}
#tip-title span {
	float: right;
}
Выборочная инициализация
Применяем скрипт только к тем ссылкам, внутри которых есть рисунок:
jQuery("a:has(img)").fancybox();
jQuery("a,a,a").fancybox();
Другой вариант — применяем к тем ссылкам href которых оканчивается на нужные расширения (jpg, png, gif):
jQuery("a,a,a").fancybox();
Advanced
Helpers provide a simple mechanism to extend the capabilities of fancyBox. There are two built-in helpers — ‘overlay’ and ‘title’.
You can disable them, set custom options or enable other helpers. Examples:
$(".fancybox").fancybox({ helpers{ titlenull}});$(".fancybox").fancybox({ helpers{ overlay null}});$(".fancybox").fancybox({ helpers{ title { type 'inside'}, overlay { css {'background''rgba(255,255,255,0.5)'}}}});$(".fancybox").fancybox({ helpers{ thumbs { width50, height50}}});
Also available are event driven callback methods. The keyword refers to the current or upcoming object (depends on callback method). Here is how you can change title:
$(".fancybox").fancybox({beforeLoadfunction(){this.title='Image '+(this.index+1)+' of '+this.group.length+(this.title?' - '+this.title'');}});
It`s possible to open fancyBox programmatically in various ways:
$.fancybox('<div><h1>Lorem Lipsum</h1><p>Lorem lipsum</p></div>',{ title 'Custom Title'});$.fancybox($("#inline"),{ title 'Custom Title'});$.fancybox({ href'example.jpg', title 'Custom Title'});$.fancybox({ href'example1.jpg', title 'Custom Title 1'},{ href'example2.jpg', title 'Custom Title 2'},{ padding});
There are several methods that allow you to interact with and manipulate fancyBox, example:
$.fancybox.close();
There is a simply way to access wrapping elements using JS:
$.fancybox.wrap$.fancybox.skin$.fancybox.outer$.fancybox.inner
You can override CSS to customize the look. For example, make navigation arrows always visible,
change width and move them outside of area (use this snippet after including fancybox.css):
.fancybox-navspan{visibilityvisible;}.fancybox-nav{width80px;}.fancybox-prev{left-80px;}.fancybox-next{right-80px;}
In that case, you might want to increase space around box:
$(".fancybox").fancybox({ margin 20,60,20,60});
API
The fancyBox API offers a couple of methods to control fancyBox.
This gives you the ability to extend the plugin and to integrate it with other web application components.
Core methods
Core methods are methods which affect/handle instances:
When calling fancyBox manually, each group item should follow this pattern:
Example of opening image gallery:
It is also possible to pass only one object. Example of opening inline content:
If you wish to display some html content (for example, a message), then you can use a simpler syntax.
It is advised to use a wrapper around your content.
Instance methods
In order to use these methods, you need an instance of the plugin’s object:
Or you can can just use fancyBox constructor:
Once you have a reference to fancyBox instance the following methods are available:
You can also do something like this:
or simply:
Events
fancyBox fires several events.
Event callbacks can be set as function properties of the options object passed to fancyBox initialization function:
It is also possible to attach an event handler for all instances.
To prevent interfering with other scripts, these events have been namespaced to .
Here is an example of binding to the event:
Настройка FancyBox 3 с помощью JavaScript
Для того чтобы использовать свои настройки для вашего FancyBox нужно выбрать ваш элемент с помощью селектора jQuery и вызвать метод fancybox. Внутри метода можно настраивать опции:
$(»).fancybox({
buttons : ,
loop: true,
gutter : 10,
keyboard: true,
arrows: true,
infobar: true,
smallBtn: true,
toolbar: false,
protect: true,
modal: true,
idleTime: 3,
animationEffect: «zoom-in-out»,
animationDuration: 600,
transitionEffect: «rotate»,
transitionDuration: 400,
slideClass: «myClass»,
baseClass: «myclass»,
slideShow: {
autoStart: true,
speed: 1000
},
youtube : {
controls : 0,
showinfo : 0
},
thumbs : {
autoStart : true
}
});
|
1 |
$(»).fancybox({ buttons ‘slideShow’, ‘share’, ‘zoom’, ‘fullScreen’, ‘download’, ‘close’ , looptrue, gutter10, keyboardtrue, arrowstrue, infobartrue, smallBtntrue, toolbarfalse, protecttrue, modaltrue, idleTime3, animationEffect»zoom-in-out», animationDuration600, transitionEffect»rotate», transitionDuration400, slideClass»myClass», baseClass»myclass», slideShow{ autoStarttrue, speed1000 }, youtube{ controls, showinfo }, thumbs{ autoStarttrue } }); |
btnTplslideShow
| Параметр | По умолчанию | Описание параметра |
|---|---|---|
| loop | false | зацикливает галерею |
| gutter | 50 | горизонтальный отступ между слайдами |
| keyboard | true | навигация с клавиатуры |
| arrows | true | показ стрелочек |
| arrowLeft и arrowRight | Позволяет задать свой шаблон для стрелочек | |
| infobar | true | Отображает счетчик слайдов в левом верхнем углу |
| smallBtn | auto | Отображает кнопку закрытия картинки(можно задать свой шаблон) |
| toolbar | auto | Отображает кнопки в верхнем правом углу. Может иметь значения true, false, «auto». Если задано значение «auto», то будет автоматически скрыт, если «smallBtn» включен. |
| protect | true | Запрещает ПКМ по изображению |
| idleTime | 3 | время в секундах по истечению которого исчезнет навигация при просмотре галереи |
| modal | false | Делает контент «модальным». Т.е. убирает навигацию с клавиатуры, кнопки и т.д. |
| animationEffect | zoom | Анимация во время всплывания/изчезновения окна. Возможные значения: «zoom», «fade», «zoom-in-out» |
| animationDuration | 366 | Скорость анимации во время всплывания/изчезновения окна. |
| transitionEffect | fade | Анимация при переходе от слайда к слайду. Возможные значения: ‘fade’, ‘slide’, ‘circular’, «tube’, ‘zoom-in-out’, ‘rotate’ |
| transitionDuration | 366 | Скорость анимации при переходе от слайда к слайду. |
| slideClass | — | Добавляет пользовательский класс к слайду. |
| baseClass | — | Добавляет пользовательский класс к обертке «fancybox-container». |
| baseTpl | — | Добавляет свою разметку шаблона. |
| spinnerTpl | — | Шаблон анимации при загрузке |
| thumbs | ||
| autoStart | false | отвечает за показ миниатюр при открытии галереи |
| slideShow | ||
| autoStart | false | отвечает за автоматический запуск пролистывания галереи после ее открытия |
| speed | 3000 | скорость пролистывания слайдов |
| youtube | ||
| controls | — | значение 0 скрывает панель управления |
| showinfo | — | значение 0 скрывает информацию |
| buttons | ||
| slideShow | — | запуск слайдшоу |
| share | — | рассказать в соцсетях |
| zoom | — | увеличение |
| fullScreen | — | развернуть на весь экран |
| close | — | кнопка закрыть |
| download | — | кнопка скачать |
| btnTpl | — | С помощью данной настройки можно задать шаблон для каждой из этих кнопок |
| autoStart | false | отвечает за автоматический запуск галереи при загрузке страницы |
| speed | 3000 | скорость анимации во время просмотра слайд-шоу |
3. Основные настройки
Тут описаны лишь основные настройки. Шаблоны, мобильные и редко используемые конфигурации можно посмотреть в
Пример использования:
$(»).fancybox({
loop: true,
autoFocus: false
});
|
1 |
$(»).fancybox({ looptrue, autoFocusfalse }); |
По умолчанию они имеют следующие значения:
Включает бесконечную навигацию по галерее.
Горизонтальное расстояние между слайдами.
Включает навигацию с помощью клавиатуры.
Запрещает подписи модального окна перекрывать его содержимое. Значение — разрешает.
Показывает навигационные стрелки по краям экрана (для галереи)
Показывает счетчик изображений в верхнем левом углу (для галереи)
Маленькая кнопка закрытия модального окна
— автоматически включена для «html», «inline» или «ajax» окон
— включена для всех окон
— выключена для всех
Показывает тулбар (справа вверху)
— автоматически выключится, если активен
— включен для всех окон
— выключен для всех
Устанавливает, какие кнопки будут показаны в тулбаре
Отключает правую кнопку мыши и использует простую защиту изображений
Делает контент «модальным» — отключает навигацию по клавиатуре, кнопки закрытия и т. д
Анимационный эффект открытия и закрытия окон
— выключен
— увеличение изображения из эскиза и уменьшение в него при закрытии
Продолжительность эффекта анимации
Прозрачность при открытии и закрытии
Эффект перехода между слайдами
Может быть: , , , , , или (без эффекта)
Продолжительность эффекта перехода между слайдами
Скрывает вертикальную полосу прокрутки браузера
Устанавливает фокус на первом фокусируемом элементе после открытия
Ставит фокус обратно на активный элемент после закрытия
Не позволяет пользователю сфокусироваться на элементе вне модального контента
Открывает окна в полный экран
— разрешает перетаскивание содержимого по вертикали
— продолжает движение после освобождения мыши / касания
Автоматически включает слайдшоу с заданной скоростью.
— отображение миниатюр при открытии
— скрывает сетку миниатюр, когда начинается анимация закрытия
— родительский элемент
— вертикальная (y) или горизонтальная (x) прокрутка
Прокрутка изображений колесом мышки
Закрытие окна по клику вне его. — отключает