Autohotkey beginner tutorial by tidbit
Содержание:
Special Keys
If your keyboard or mouse has a key not listed above, you might still be able to make it a hotkey by using the following steps:
- Ensure that at least one script is running that is using the keyboard hook. You can tell if a script has the keyboard hook by opening its main window and selecting «View->Key history» from the menu bar.
- Double-click that script’s tray icon to open its main window.
- Press one of the «mystery keys» on your keyboard.
- Select the menu item «View->Key history»
- Scroll down to the bottom of the page. Somewhere near the bottom are the key-down and key-up events for your key. NOTE: Some keys do not generate events and thus will not be visible here. If this is the case, you cannot directly make that particular key a hotkey because your keyboard driver or hardware handles it at a level too low for AutoHotkey to access. For possible solutions, see further below.
- If your key is detectable, make a note of the 3-digit hexadecimal value in the second column of the list (e.g. 159).
- To define this key as a hotkey, follow this example:
SC159:: ; Replace 159 with your key's value.
MsgBox, %A_ThisHotkey% was pressed.
return
Reverse direction: To remap some other key to become a «mystery key», follow this example:
; Replace 159 with the value discovered above. Replace FF (if needed) with the
; key's virtual key, which can be discovered in the first column of the Key History screen.
#c::Send {vkFFsc159} ; See  for more details.
Alternate solutions: If your key or mouse button is not detectable by the Key History screen, one of the following might help:
-
Reconfigure the software that came with your mouse or keyboard (sometimes accessible in the Control Panel or Start Menu) to have the «mystery key» send some other keystroke. Such a keystroke can then be defined as a hotkey in a script. For example, if you configure a mystery key to send Ctrl+F1, you can then indirectly make that key as a hotkey by using in a script.
-
Try AHKHID. You can also try searching the forum for a keywords like , or .
-
The following is a last resort and generally should be attempted only in desperation. This is because the chance of success is low and it may cause unwanted side-effects that are difficult to undo:
Disable or remove any extra software that came with your keyboard or mouse or change its driver to a more standard one such as the one built into the OS. This assumes there is such a driver for your particular keyboard or mouse and that you can live without the features provided by its custom driver and software.
Tray Icon
By default, each script adds its own icon to the taskbar notification area (commonly known as the tray).
The tray icon usually looks like this (but the color or letter changes when the script is paused or suspended):
Right-click the tray icon to show the tray menu, which has the following options by default:
- Open — Open the script’s .
- Help — Open the AutoHotkey offline help file.
- Window Spy — Displays various information about a window.
- Reload This Script — See Reload.
- Edit This Script — See Edit.
- Suspend Hotkeys — Suspend or unsuspend hotkeys.
- Pause Script — Pause or unpause the script.
- Exit — Exit the script.
By default, double-clicking the tray icon shows the script’s .
The Menu command can be used to customise the tray icon and menu.
The #NoTrayIcon directive can be used to hide the tray icon.
General Remarks
Characters vs. keys: By default, characters are sent by first translating them to keystrokes. If this translation is not possible (that is, if the current keyboard layout does not contain a key or key combination which produces that character), the character is sent by one of following fallback methods:
- SendEvent and SendInput use SendInput() with the . : ANSI builds of AutoHotkey convert the character to Unicode before sending it. Prior to v1.1.27, ANSI builds used the Alt+nnnnn method.
- SendPlay uses the method, which produces Unicode only if supported by the target application.
- ControlSend posts a WM_CHAR message.
Note: Characters sent using any of the above methods usually do not trigger keyboard shortcuts or hotkeys.
: For characters in the range a-z or A-Z (plain ASCII letters), each character which does not exist in the current keyboard layout may be sent either as a character or as the corresponding virtual keycode (vk41-vk5A):
- If a naked letter is sent (that is, without modifiers or braces), or if mode is in effect, it is sent as a character. For example, sends the expected text, even though pressing R (vk52) produces some other character (such as К on the Russian layout). can be omitted in this case, unless a modifier key was put into effect by a prior Send.
- If one or more modifier keys have been put into effect by the Send command, or if the letter is wrapped in braces, it is sent as a keycode (modified with Shift if the letter is upper-case). This allows the script to easily activate standard keyboard shortcuts. For example, and activate the standard Ctrl+C shortcut and is equivalent to .
If the letter exists in the current keyboard layout, it is always sent as whichever keycode the layout associates with that letter (unless the is used, in which case the character is sent by other means). In other words, the section above is only relevant for non-Latin based layouts such as Russian.
Modifier State: When Send is required to change the state of the Win or Alt modifier keys (such as if the user was holding one of those keys), it may inject additional keystrokes (Ctrl by default) to prevent the Start menu or window menu from appearing. For details, see #MenuMaskKey.
BlockInput Compared to SendInput/SendPlay: Although the BlockInput command can be used to prevent any keystrokes physically typed by the user from disrupting the flow of simulated keystrokes, it is often better to use or so that keystrokes and mouse clicks become uninterruptible. This is because unlike BlockInput, SendInput/Play does not discard what the user types during the send; instead, such keystrokes are buffered and sent afterward.
When sending a large number of keystrokes, a can be used to improve readability and maintainability.
Since the operating system does not allow simulation of the Ctrl+Alt+Del combination, doing something like will have no effect.
Send may have no effect on Windows Vista or later if the active window is running with administrative privileges and the script is not. This is due to a security mechanism called User Interface Privilege Isolation.
Run arbitrary AutoHotkey scripts
from ahk import AHK

ahk = AHK()

ahk_script = 'Run Notepad'
ahk.run_script(ahk_script, blocking=False)
Communicating data from ahk to Python
If you’re writing your own ahk scripts to use with this library, you can use with the parameter to get data from your ahk script into Python.
Suppose you have a script like so
#Persistent
data := "Hello Data!"
FileAppend, %data%, * ; send data var to stdout
ExitApp
result = ahk.run_script(my_script)
print(result)  # Hello Data!
If your autohotkey returns something that can’t be decoded, add the keyword argument in which case you’ll get back a object where stdout (and stderr) will be bytes and you can handle it however you choose.
result = ahk.run_script(my_script, decode=False)
print(result.stdout)  # b'Hello Data!'
Return, Exit, and General Remarks
If the flow of execution within a function reaches the function’s closing brace prior to encountering a Return, the function ends and returns a blank value (empty string) to its caller. A blank value is also returned whenever the function explicitly omits Return’s parameter.
When a function uses the Exit command to terminate the current thread, its caller does not receive a return value at all. For example, the statement would leave unchanged if exits. The same thing happens if a function causes a runtime error such as running a nonexistent file (when is not in effect).
A function may alter the value of ErrorLevel for the purpose of returning an extra value that is easy to remember.
To call a function with one or more blank values (empty strings), use an empty pair of quotes as in this example: .
Since calling a function does not start a new thread, any changes made by a function to settings such as SendMode and SetTitleMatchMode will go into effect for its caller too.
The caller of a function may pass a nonexistent variable or array element to it, which is useful when the function expects the corresponding parameter to be . For example, calling would create the variable automatically as a or global (depending on whether the caller is inside a function and whether it has the in effect).
When used inside a function, ListVars displays a function’s along with their contents. This can help debug a script.
SendInput [v1.0.43+]
SendInput is generally the preferred method to send keystrokes and mouse clicks because of its superior speed and reliability. Under most conditions, SendInput is nearly instantaneous, even when sending long strings. Since SendInput is so fast, it is also more reliable because there is less opportunity for some other window to pop up unexpectedly and intercept the keystrokes. Reliability is further improved by the fact that anything the user types during a SendInput is postponed until afterward.
Unlike the other sending modes, the operating system limits SendInput to about 5000 characters (this may vary depending on the operating system’s version and performance settings). Characters and events beyond this limit are not sent.
Note: SendInput ignores SetKeyDelay because the operating system does not support a delay in this mode. However, when SendInput reverts to under the conditions described below, it uses (unless SendEvent’s KeyDelay is , in which case is used). When SendInput reverts to , it uses SendPlay’s KeyDelay.
If a script other than the one executing SendInput has a low-level keyboard hook installed, SendInput automatically reverts to (or if is in effect). This is done because the presence of an external hook disables all of SendInput’s advantages, making it inferior to both SendPlay and SendEvent. However, since SendInput is unable to detect a low-level hook in programs other than , it will not revert in these cases, making it less reliable than SendPlay/Event.
When SendInput sends mouse clicks by means such as , and is in effect (the default), every click will be relative to the window that was active at the start of the send. Therefore, if SendInput intentionally activates another window (by means such as alt-tab), the coordinates of subsequent clicks within the same command will be wrong because they will still be relative to the old window rather than the new one.
Special modes
The following modes affect the interpretation of the characters in Keys or the behavior of key-sending commands such as Send, SendInput, SendPlay, SendEvent and ControlSend. These modes must be specified as in Keys, where x is either Raw, Text, or Blind. For example, .
Raw mode
The Raw mode can be either enabled with , SendRaw or ControlSendRaw, which causes all subsequent characters, including the special characters , to be interpreted literally rather than translating to Enter, to Ctrl+C, etc. For example, both and send instead of Tab.
The Raw mode does not affect the interpretation of escape sequences, and . For example, sends the string . When using ControlSend, it is also necessary to escape literal commas ().
Text mode
The Text mode can be enabled with , which is similar to the Raw mode, except that no attempt is made to translate characters (other than , , and ) to keycodes; instead, the is used for all of the remaining characters. For SendEvent, SendInput and ControlSend, this improves reliability because the characters are much less dependent on correct modifier state. This mode can be combined with the Blind mode to avoid releasing any modifier keys: . However, some applications require that the modifier keys be released.
, and are all translated to a single Enter, unlike the default behavior and Raw mode, which translate to two Enter. is translated to Tab and to Backspace, but all other characters are sent without translation.
: Like the Blind mode, the Text mode ignores SetStoreCapsLockMode (that is, the state of CapsLock is not changed) and does not . This is because the Text mode typically does not depend on the state of CapsLock and cannot trigger the system Win+L hotkey. However, this only applies when Keys begins with or .
Blind mode
The Blind mode can be enabled with , which gives the script more control by disabling a number of things that are normally done automatically to make things work as expected. must be the first item in the string to enable the Blind mode. It has the following effects:
- The Blind mode avoids releasing the modifier keys (Alt, Ctrl, Shift, and Win) if they started out in the down position. For example, the hotkey would send ABC rather than abc because the user is holding down Shift.
- Modifier keys are restored differently to allow a Send to turn off a hotkey’s modifiers even if the user is still physically holding them down. For example, automatically pushes Ctrl back down if the user is still physically holding Ctrl, whereas allows Ctrl to be logically up even though it is physically down.
- SetStoreCapsLockMode is ignored; that is, the state of CapsLock is not changed.
- Menu masking is disabled. That is, Send omits the extra keystrokes that would otherwise be sent in order to prevent: 1) Start Menu appearance during Win keystrokes (LWin/RWin); 2) menu bar activation during Alt keystrokes. However, the Blind mode does not prevent masking performed by the keyboard hook following activation of a hook hotkey.
- Send does not wait for Win to be released even if the text contains an L keystroke. This would normally be done to prevent Send from triggering the system «lock workstation» hotkey (Win+L). See for details.
The Blind mode is used internally when remapping a key. For example, the remapping would produce: 1) «b» when you type «a»; 2) uppercase «B» when you type uppercase «A»; and 3) Ctrl+B when you type Ctrl+A.
is not supported by SendRaw or ControlSendRaw; use instead.
The Blind mode is not completely supported by , especially when dealing with the modifier keys (Ctrl, Alt, Shift, and Win).
Send variants
Send: By default, Send is synonymous with SendEvent; but it can be made a synonym for SendInput or SendPlay via SendMode.
SendRaw: Similar to Send, except that all characters in Keys are interpreted and sent literally. See for details.
SendInput and SendPlay : SendInput and SendPlay use the same syntax as Send but are generally faster and more reliable. In addition, they buffer any physical keyboard or mouse activity during the send, which prevents the user’s keystrokes from being interspersed with those being sent. SendMode can be used to make Send synonymous with SendInput or SendPlay. For more details about each mode, see and below.
SendEvent : SendEvent sends keystrokes using the same method as the pre-1.0.43 Send command. The rate at which keystrokes are sent is determined by SetKeyDelay.
Repeating or Holding Down a Key
To repeat a keystroke: Enclose in braces the name of the key followed by the number of times to repeat it. For example:
Send {DEL 4}  ; Presses the Delete key 4 times.
Send {S 30}   ; Sends 30 uppercase S characters.
Send +{TAB 4}  ; Presses Shift-Tab 4 times.
To hold down or release a key: Enclose in braces the name of the key followed by the word Down or Up. For example:
Send {b down}{b up}
Send {TAB down}{TAB up}
Send {Up down}  ; Press down the up-arrow key.
Sleep 1000  ; Keep it down for one second.
Send {Up up}  ; Release the up-arrow key.
When a key is held down via the method above, it does not begin auto-repeating like it would if you were physically holding it down (this is because auto-repeat is a driver/hardware feature). However, a Loop can be used to simulate auto-repeat. The following example sends 20 tab keystrokes:
Loop 20
{
    Send {Tab down}  ; Auto-repeat consists of consecutive down-events (with no up-events).
    Sleep 30  ; The number of milliseconds between keystrokes (or use SetKeyDelay).
}
Send {Tab up}  ; Release the key.
By default, Send will not automatically release a modifier key (Control, Shift, Alt, and Win) if that modifier key was «pressed down» by sending it. For example, may behave similar to if the user is physically holding Ctrl, but followed by will produce Ctrl+A. DownTemp and DownR can be used to override this behavior. DownTemp and DownR have the same effect as Down except for the modifier keys (Control, Shift, Alt, and Win).
DownTemp tells subsequent sends that the key is not permanently down, and may be released whenever a keystroke calls for it. For example, followed later by would produce A, not Ctrl+A. Any use of Send may potentially release the modifier permanently, so DownTemp is not ideal for remapping modifier keys.
: DownR (where «R» stands for remapping, which is its main use) tells subsequent sends that if the key is automatically released, it should be pressed down again when send is finished. For example, followed later by would produce A, not Ctrl+A, but will leave Ctrl in the pressed state for use with keyboard shortcuts. In other words, DownR has an effect similar to physically pressing the key.
If a character does not correspond to a virtual key on the current keyboard layout, it cannot be «pressed» or «released». For example, has no effect on most layouts, and is equivalent to .
Language Syntax
When are quotation marks used with commands and their parameters?
Double quotes («) have special meaning only within . In all other places, they are treated literally as if they were normal characters. However, when a script launches a program or document, the operating system usually requires quotes around any command-line parameter that contains spaces, such as in this example: .
When exactly are variable names enclosed in percent signs?
Variable names are always enclosed in percent signs except in cases illustrated in bold below:
- In parameters that are input or output variables:
- On the left side of an assignment:
- On the left side of traditional (non-expression) if-statements:
- Everywhere in . For example:
If (Var1 <> Var2)
      Var1 := Var2 + 100
For further explanation of how percent signs are used, see and . Percent signs can also have other meanings:
- The causes a command parameter to be interpreted as an expression.
- Escaped percent signs () and percent signs in have no special meaning (they are interpreted as literal percent signs).
When should percent signs and commas be escaped?
Literal percent signs must be escaped by preceding them with an accent/backtick. For example: Literal commas must also be escaped () except when used in MsgBox or the last parameter of any command (in which case the accent is permitted but not necessary).
When commas or percent signs are enclosed in quotes within an , the accent is permitted but not necessary. For example: .
Basic Operation
Any valid expression may be used to define the context in which a hotkey should be active. For example:
#If WinActive("ahk_class Notepad") or WinActive(MyWindowTitle)
#Space::MsgBox You pressed Win+Spacebar in Notepad or %MyWindowTitle%.
Like the #IfWin directives, #If is positional: it affects all hotkeys and hotstrings physically beneath it in the script. #If and #IfWin are also mutually exclusive; that is, only the most recent #If or #IfWin will be in effect.
To turn off context sensitivity, specify #If or any #IfWin directive but omit all the parameters. For example:
#If
Like other directives, #If cannot be executed conditionally.
Main Window
The script’s main window is usually hidden, but can be shown via the or one of the commands listed below to gain access to information useful for debugging the script. Items under the View menu control what the main window displays:
- Lines most recently executed — See ListLines.
- Variables and their contents — See ListVars.
- Hotkeys and their methods — See ListHotkeys.
- Key history and script info — See KeyHistory.
Known issue: Keyboard shortcuts for menu items do not work while the script is displaying a message box or other dialog.
The built-in variable contains the unique ID (HWND) of the script’s main window.
Closing this window with WinClose (even from another script) causes the script to exit, but most other methods just hide the window and leave the script running.
Minimizing the main window causes it to automatically be hidden. This is done to prevent any owned windows (such as GUI windows or certain dialog windows) from automatically being minimized, but also has the effect of hiding the main window’s taskbar button. To instead allow the main window to be minimized normally, override the default handling with OnMessage. For example:
; This prevents the main window from hiding on minimize:
OnMessage(0x0112, Func("PreventAutoMinimize")) ; WM_SYSCOMMAND = 0x0112
OnMessage(0x0005, Func("PreventAutoMinimize")) ; WM_SIZE = 0x0005
; This prevents owned GUI windows (but not dialogs) from automatically minimizing:
OnMessage(0x0018, Func("PreventAutoMinimize"))

PreventAutoMinimize(wParam, lParam, uMsg, hwnd) {
    if (uMsg = 0x0112 && wParam = 0xF020 && hwnd = A_ScriptHwnd) { ; SC_MINIMIZE = 0xF020
        WinMinimize
        return 0 ; Prevent main window from hiding.
    }
    if (uMsg = 0x0005 && wParam = 1 && hwnd = A_ScriptHwnd) ; SIZE_MINIMIZED = 1
        return 0 ; Prevent main window from hiding.
    if (uMsg = 0x0018 && lParam = 1) ; SW_PARENTCLOSING = 1
        return 0 ; Prevent owned window from minimizing.
}
Main Window Title
The title of the script’s main window is used by the #SingleInstance and Reload mechanisms to identify other instances of the same script. Changing the title prevents the script from being identified as such. The default title depends on how the script was loaded:
| Loaded From | Title Expression | Example |
|---|---|---|
| .ahk file | E:\My Script.ahk — AutoHotkey v1.1.33.09 | |
| Main resource (compiled script) | E:\My Script.exe | |
| Any other resource | E:\My AutoHotkey.exe — *BUILTIN-TOOL.AHK |
The following code illustrates how the default title could be determined by the script itself (but the actual title can be retrieved with WinGetTitle):
title := A_ScriptFullPath
if !A_IsCompiled
    title .= " - AutoHotkey v" A_AhkVersion
; For the correct result, this must be evaluated by the resource being executed,
; not an #include (unless the #include was merged into the script by Ahk2Exe):
else if SubStr(A_LineFile, 1, 1) = "*" && A_LineFile != "*#1"
    title .= " - " A_LineFile
Написание собственных скриптов
Одна из основных функций Autohotkey – автозамена текста. Она позволяет задать сокращение символов для вывода полного текста. Например, если вам приходится каждый день отправлять по несколько одинаковых писем, вы можете ускорить этот процесс, создав для них единый шаблон.
Просто напечатайте два двоеточия, затем требуемое сочетание символов. Добавив еще два двоеточия, напечатайте полную фразу. Например, чтобы автоматически набирать адрес электронной почты, используйте такой сценарий:
::@@::ваш_адрес@домен.com
Запустив сценарий, вы сможете в любом приложении Windows автоматически выводить адрес электронной почты после набора на клавиатуре «@@» и пробела, точки или запятой.
Эту функцию можно использовать и для создания шаблона электронного письма:
^!с::

Send Здравствуйте,Это шаблон письма.

return
При нажатии сочетания клавиш «Ctrl» + «Alt» + «С», автоматически появится весь текст.
Вторая основная функция AutoHotkey — переназначение клавиш, которыми вы не пользуетесь. Возможно, вы захотите, чтобы клавиша «Insert» выполняла функцию копирования, тогда вам понадобится следующий код:
Insert::^c
Утилита AutoHotkey предоставляет неограниченные возможности для настройки системы согласно именно вашим предпочтениям. Не обязательно писать длинные и сложные скрипты – для автоматизации повседневной работы хватит несколько простых и коротких сценариев. Однако при желании можно создавать сложные сценарии, чтобы получить максимум пользы от утилиты.
Сила AutoHotkey
Отличительной особенностью AutoHotkey является то, что он полностью настраивается для ваших нужд. Если вы просто хотите автозамену и несколько простых битов расширения текста, вы можете легко настроить это. Если вы хотите углубиться в множество пользовательских элементов управления и сложных сочетаний клавиш, вы можете написать все, что пожелаете.
У вас не должно возникнуть проблем с использованием AHK! Мы писали о том, как это может помочь вам более эффективно играть в Path of Exile
и, скорее всего, это может помочь с вашей любимой игрой. Не геймер? Объедините это с существующими ярлыками Microsoft Office
и вы будете более продуктивны, чем когда-либо прежде!
Какие ваши любимые варианты использования AutoHotkey? Поделитесь своими любимыми сценариями с нами ниже, чтобы расширить список!
Имидж Кредит: проведение стоматологического оборудования FabrikaSimf через Shutterstock
Установка AutoHotkey
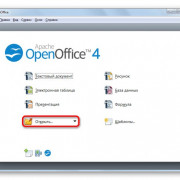
Прежде чем вы сможете протестировать некоторые скрипты или создать свои собственные, вам нужно установить AutoHotkey. Посетите главную страницу AHK, нажмите Скачать на правой стороне, и выберите монтажник захватить самую простую версию для установки. Запустите диалог быстрой установки, и AutoHotkey будет запущен и готов к работе!
Теперь только что установленная программа обрабатывает выполнение сценариев, которые вы пишете на языке AutoHotkey, но у вас еще нет запущенных сценариев! Чтобы создать новый, убедитесь, что AutoHotkey запущен (откройте меню «Пуск» и введите AutoHotkey запустить программу), затем щелкните правой кнопкой мыши в любом месте на рабочем столе или в любом другом удобном месте и выберите New> AutoHotkey Script. Назовите это что-нибудь полезное и убедитесь, что файл заканчивается .АХК, или это не будет работать правильно.
Если вы собираетесь писать несколько сценариев для AutoHotkey, неплохо бы обновить ваш текстовый редактор из мягкого блокнота
, Notepad ++ — отличный бесплатный вариант, который рекомендуется для этой цели
Обратите внимание, что вы можете открыть свой текстовый редактор, ввести код и просто сохранить его как файл, оканчивающийся на .АХК и вы достигнете того же результата, что и вышеописанный метод
Теперь, когда у вас есть программное обеспечение для запуска сценариев, вы можете загрузить код, написанный другими, для автоматизации всех видов задач. Чтобы сохранить скрипт, просто загрузите его как .АХК файл и сохранить его, где вы хотите.
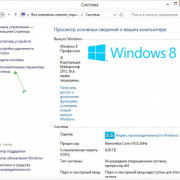
Возможно, вы захотите, чтобы некоторые из этих сценариев запускались сразу после загрузки компьютера, поэтому вам не нужно каждый раз запускать их вручную. Для этого скопируйте и вставьте .АХК файлы в папку «Автозагрузка», набрав оболочка: запуск в меню «Пуск» или перейдя по следующему адресу:
Это обеспечит их запуск сразу после запуска, поэтому вы не пытаетесь использовать комбинации клавиш и ничего не получаете!
Hotkey Tips and Remarks
Each numpad key can be made to launch two different hotkey subroutines depending on the state of NumLock. Alternatively, a numpad key can be made to launch the same subroutine regardless of the state. For example:
NumpadEnd::
Numpad1::
MsgBox, This hotkey is launched regardless of whether NumLock is on.
return
If the is used with a even once, it changes the behavior of that prefix key for all combinations. For example, in both of the below hotkeys, the active window will receive all right-clicks even though only one of the definitions contains a tilde:
~RButton & LButton::MsgBox You pressed the left mouse button while holding down the right.
RButton & WheelUp::MsgBox You turned the mouse wheel up while holding down the right button.
The Suspend command can temporarily disable all hotkeys except for ones you make exempt. For greater selectivity, use #IfWinActive/Exist.
By means of the Hotkey command, hotkeys can be created dynamically while the script is running. The Hotkey command can also modify, disable, or enable the script’s existing hotkeys individually.
Joystick hotkeys do not currently support modifier prefixes such as ^ (Ctrl) and # (Win). However, you can use to mimic this effect as shown in the following example:
Joy2::
if not GetKeyState("Control")  ; Neither the left nor right Control key is down.
    return  ; i.e. Do nothing.
MsgBox You pressed the first joystick's second button while holding down the Control key.
return
There may be times when a hotkey should wait for its own modifier keys to be released before continuing. Consider the following example:
^!s::Send {Delete}
Pressing Ctrl+Alt+S would cause the system to behave as though you pressed Ctrl+Alt+Del (due to the system’s aggressive detection of this hotkey). To work around this, use KeyWait to wait for the keys to be released; for example:
^!s::
KeyWait Control
KeyWait Alt
Send {Delete}
return
If a hotkey label like produces an error like «Invalid Hotkey», your system’s keyboard layout/language might not have the specified character («Z» in this case). Try using a different character that you know exists in your keyboard layout.
A hotkey label can be used as the target of a Gosub or Goto. For example: . See for related details.
One common use for hotkeys is to start and stop a repeating action, such as a series of keystrokes or mouse clicks. For an example of this, see .
Finally, each script is quasi multi-threaded, which allows a new hotkey to be launched even when a previous hotkey subroutine is still running. For example, new hotkeys can be launched even while a message box is being displayed by the current hotkey.